Integrate Unity Apple Sign-in with AGS Starter
Overview
You can integrate your Apple sign-in with AGS Starter so that your players can log in to your game using their iCloud account.
Prerequisites
To complete this procedure, you will need the following:
- A project built using the Unity Game Engine version 2019.4 LTS or later
- Accelbyte SDK v15.2.0 or later
- An Apple developer account
- Apple Sign In For Unity SDK v1.4.2 or later
- XCode v12.4 or later
Configure Apple Sign-in
Use the following steps to integrate Unity Apple Sign-in with AGS Starter.
- Download the Apple Sign In For Unity SDK plugin and import it to Unity.
- Go to the Apple Developer page.
- Open the Certificates, Identifiers & Profiles page, then follow the tutorials below in order.
Create an App ID
Follow the steps below to create an App ID:
Click Identifiers on the left side of the page and click the plus (+) button.
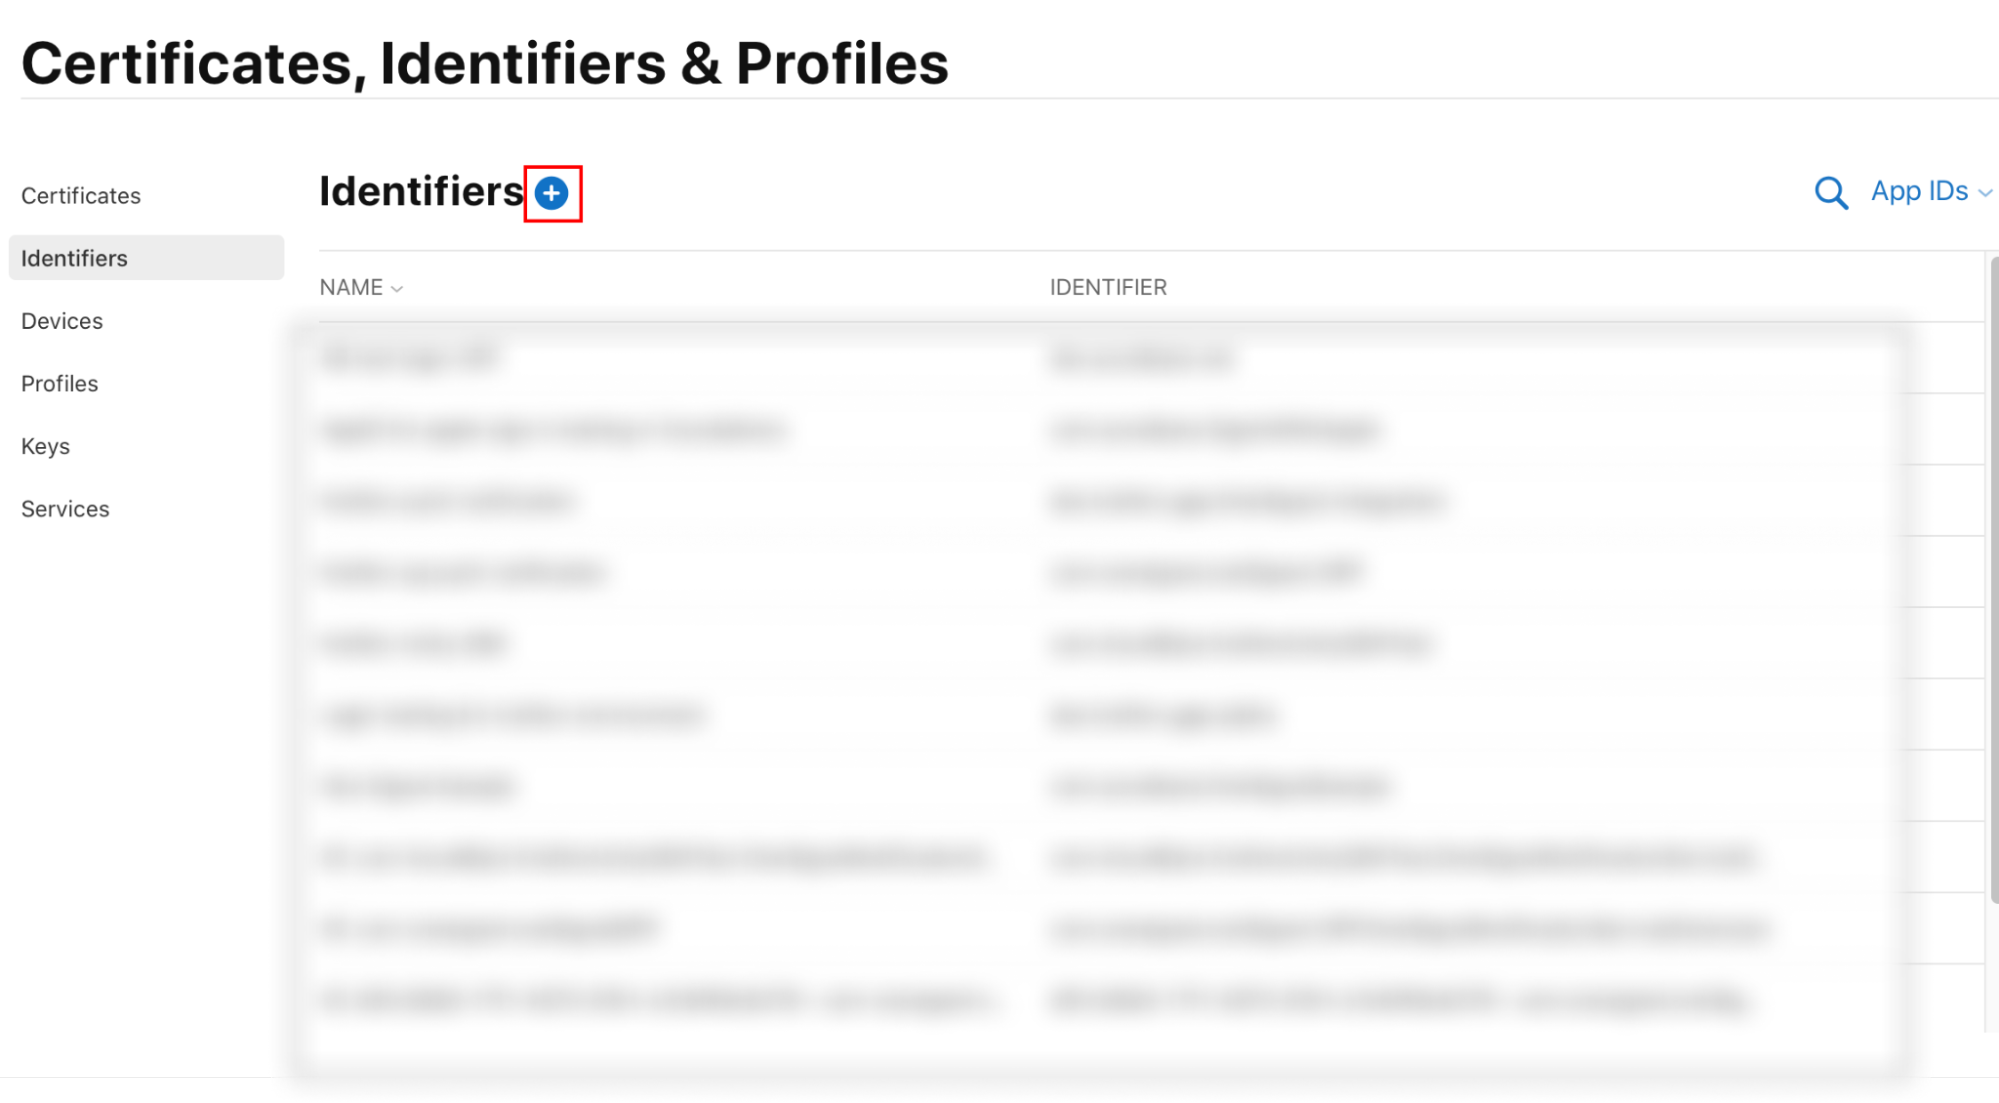
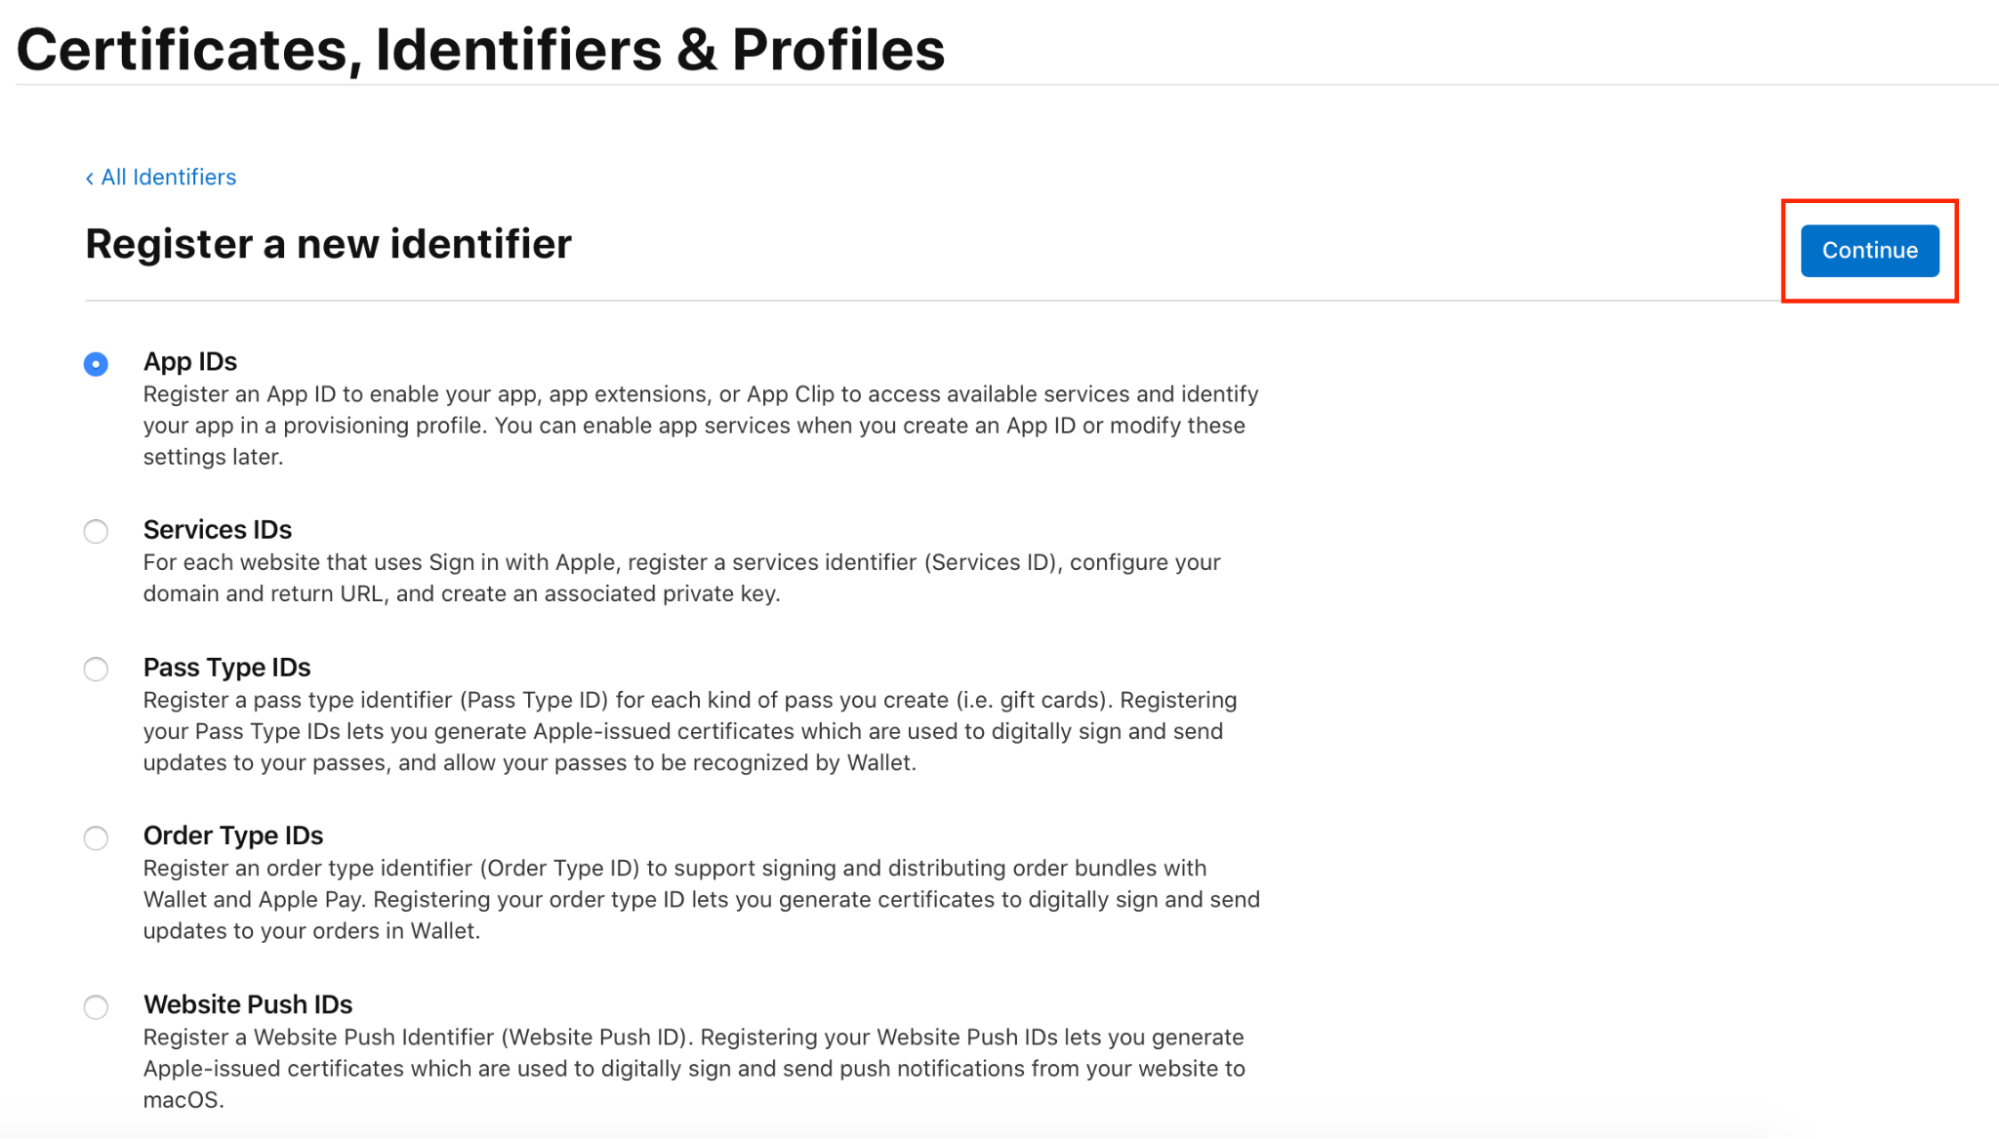
Select App IDs and click Continue.
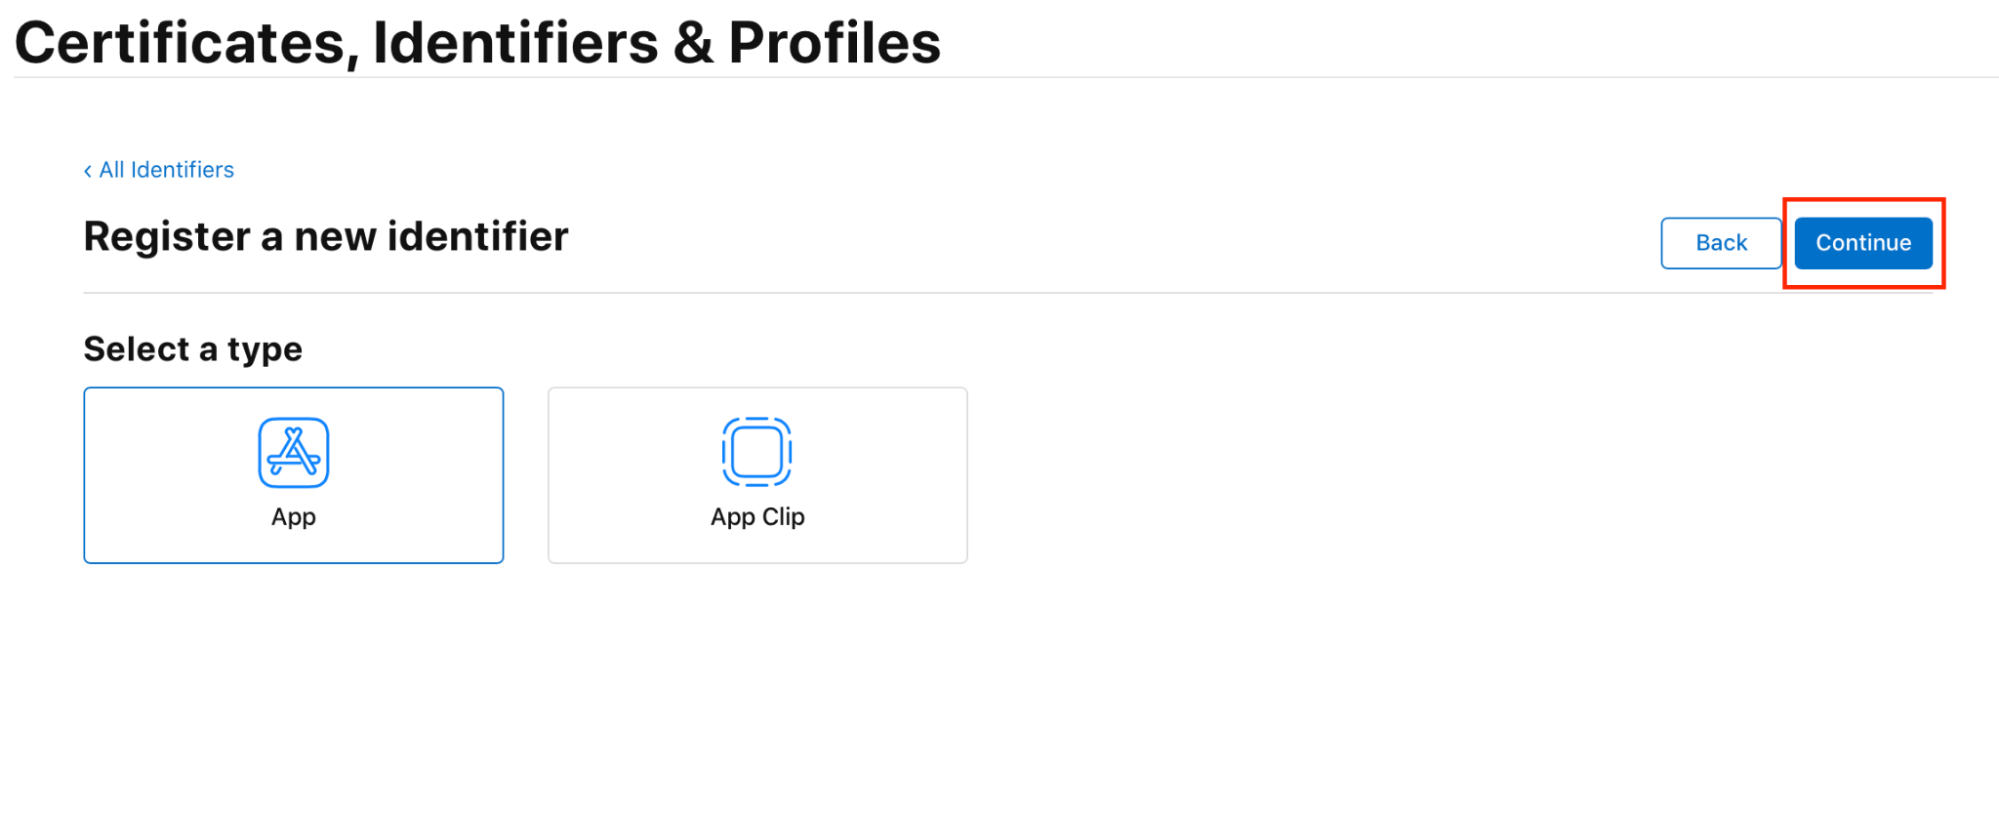
Select App and click Continue.
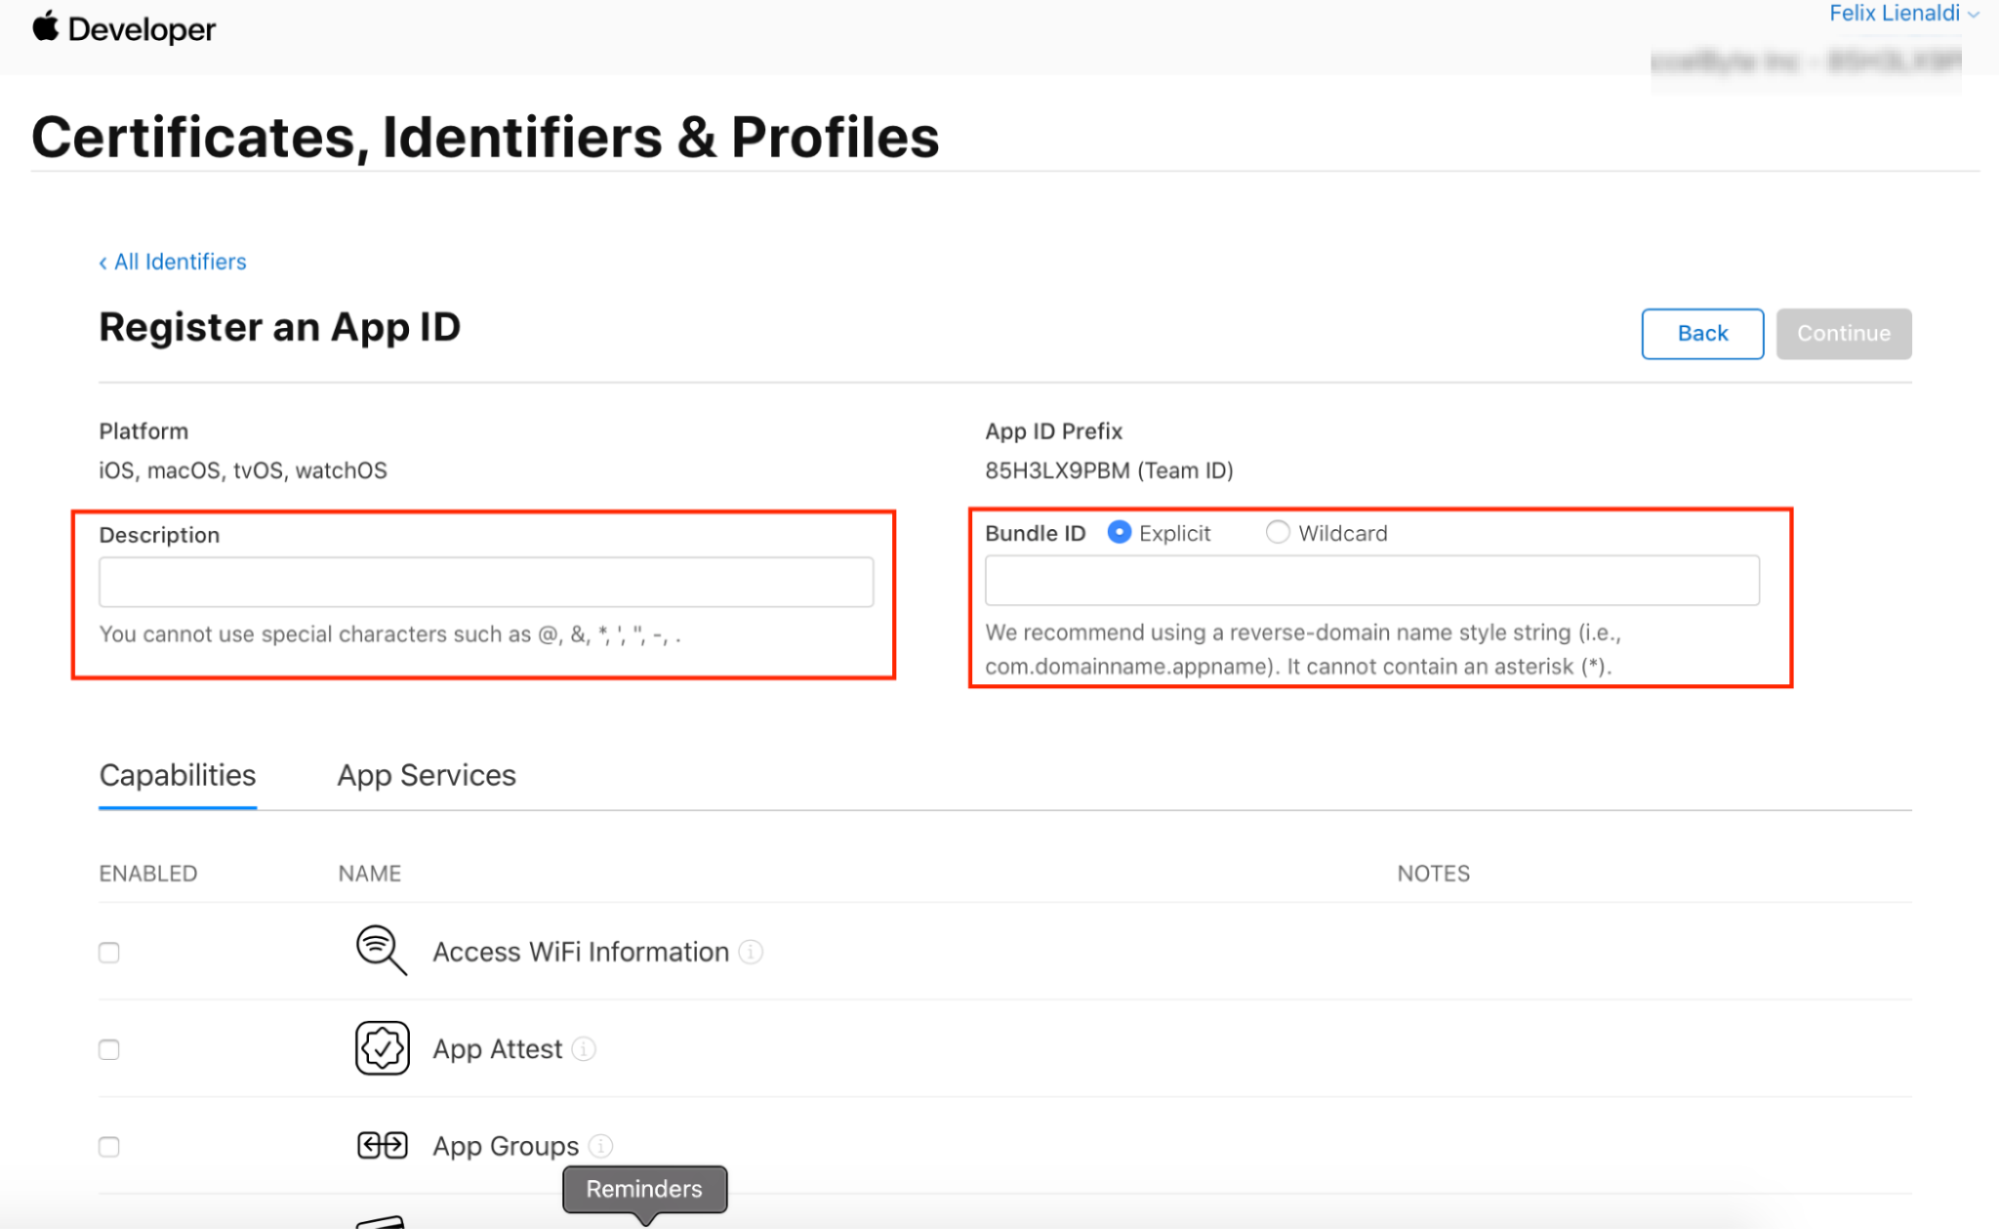
Type a description for your app in the Description field and fill in the Bundle ID field with your app’s package name, for example com.accelbyte.SignInWithApple.
In the Capabilities section, select the checkbox next to Sign In With Apple. Then, click Edit.
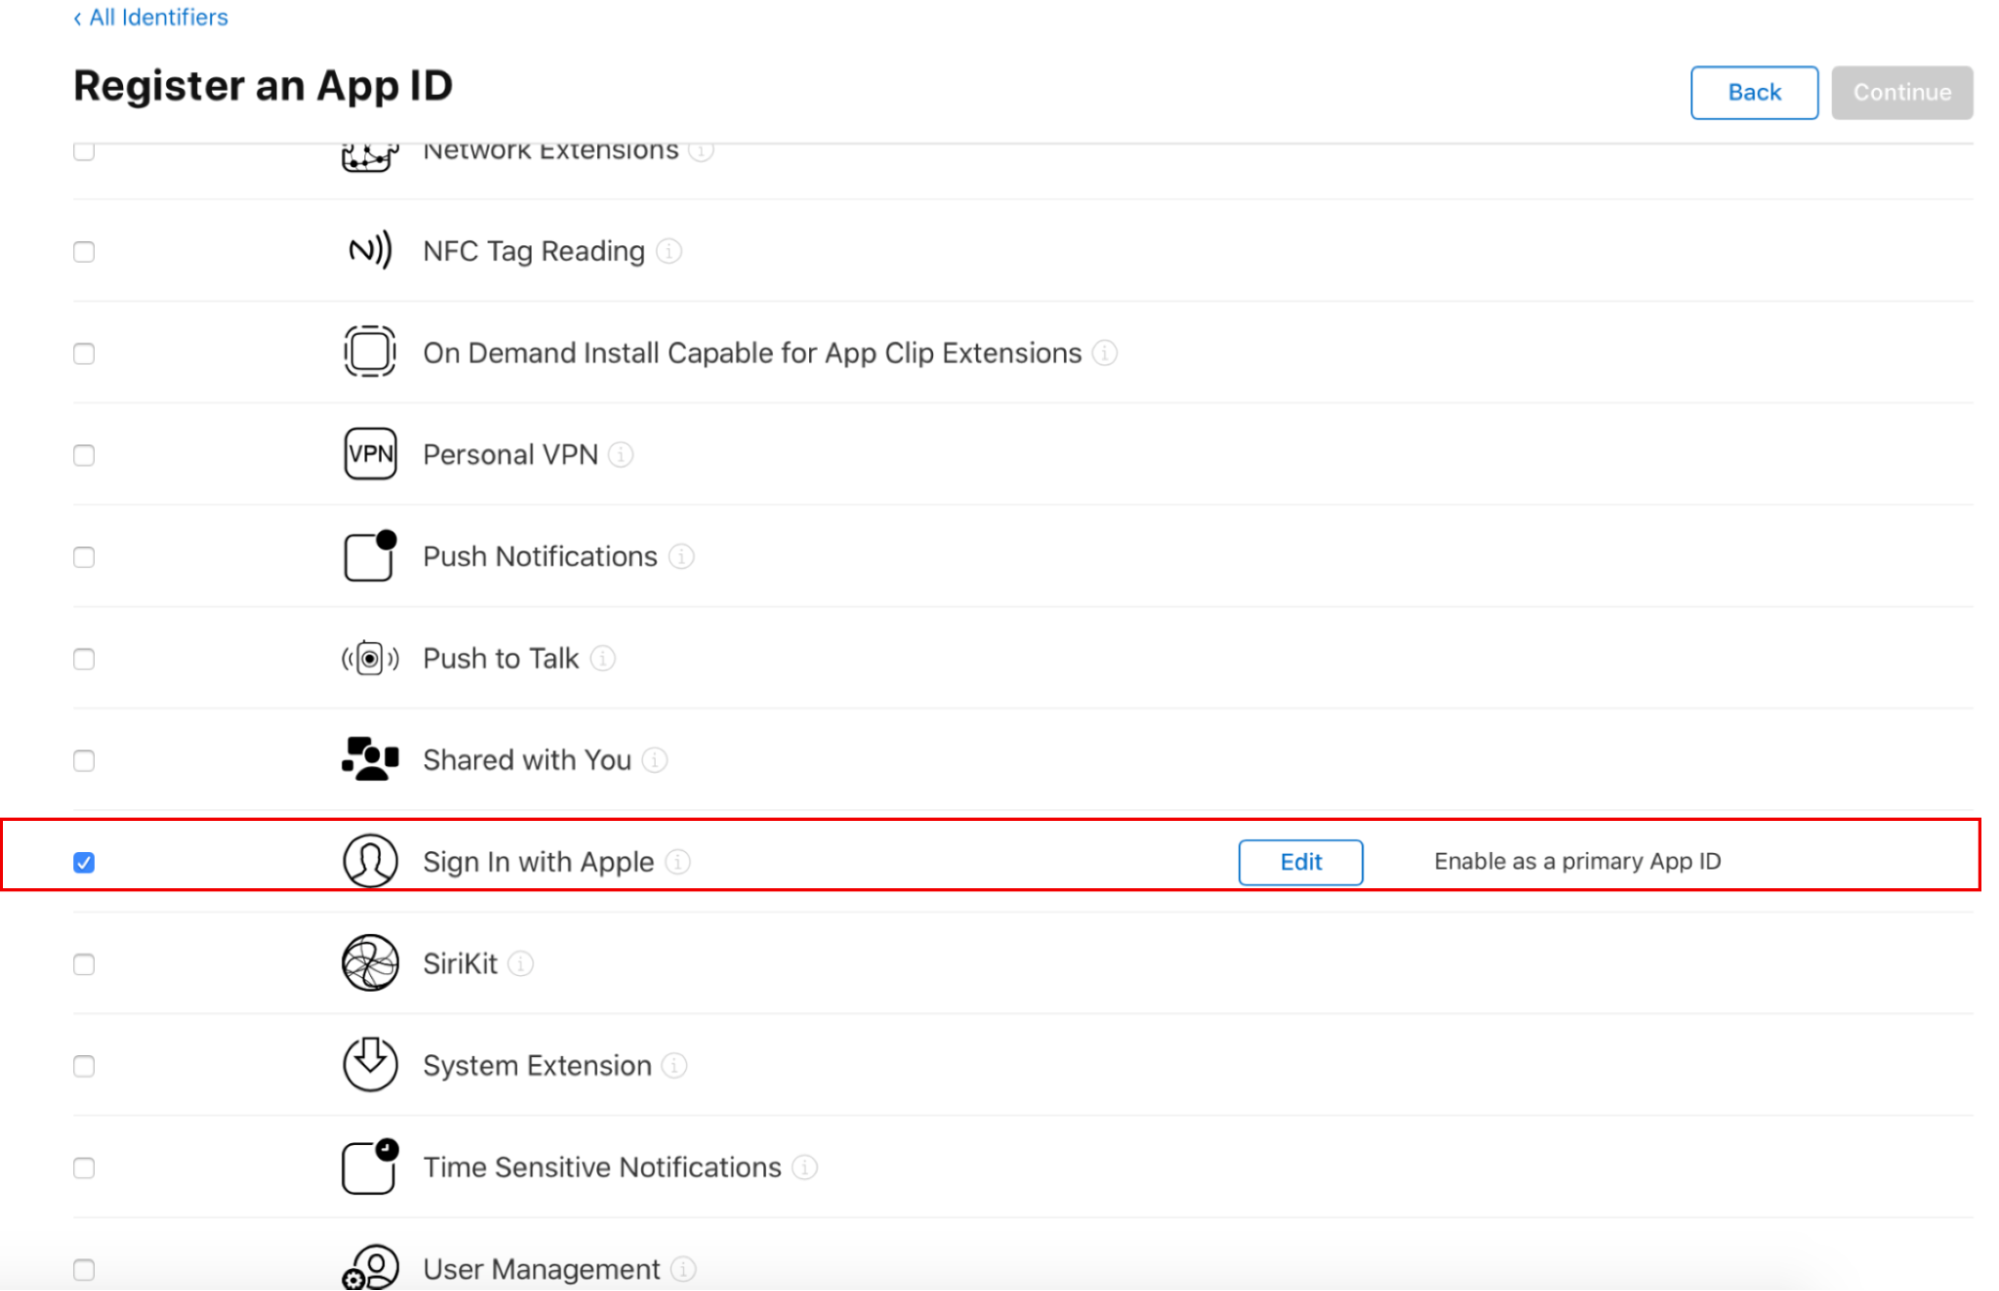
The Sign In with Apple: App ID Configuration form appears. Fill in the Server to Server Notification Endpoint using the following format:
https://{namespace}.{environment}.gamingservices.accelbyte.io/iam/v3/platforms/apple/authenticate
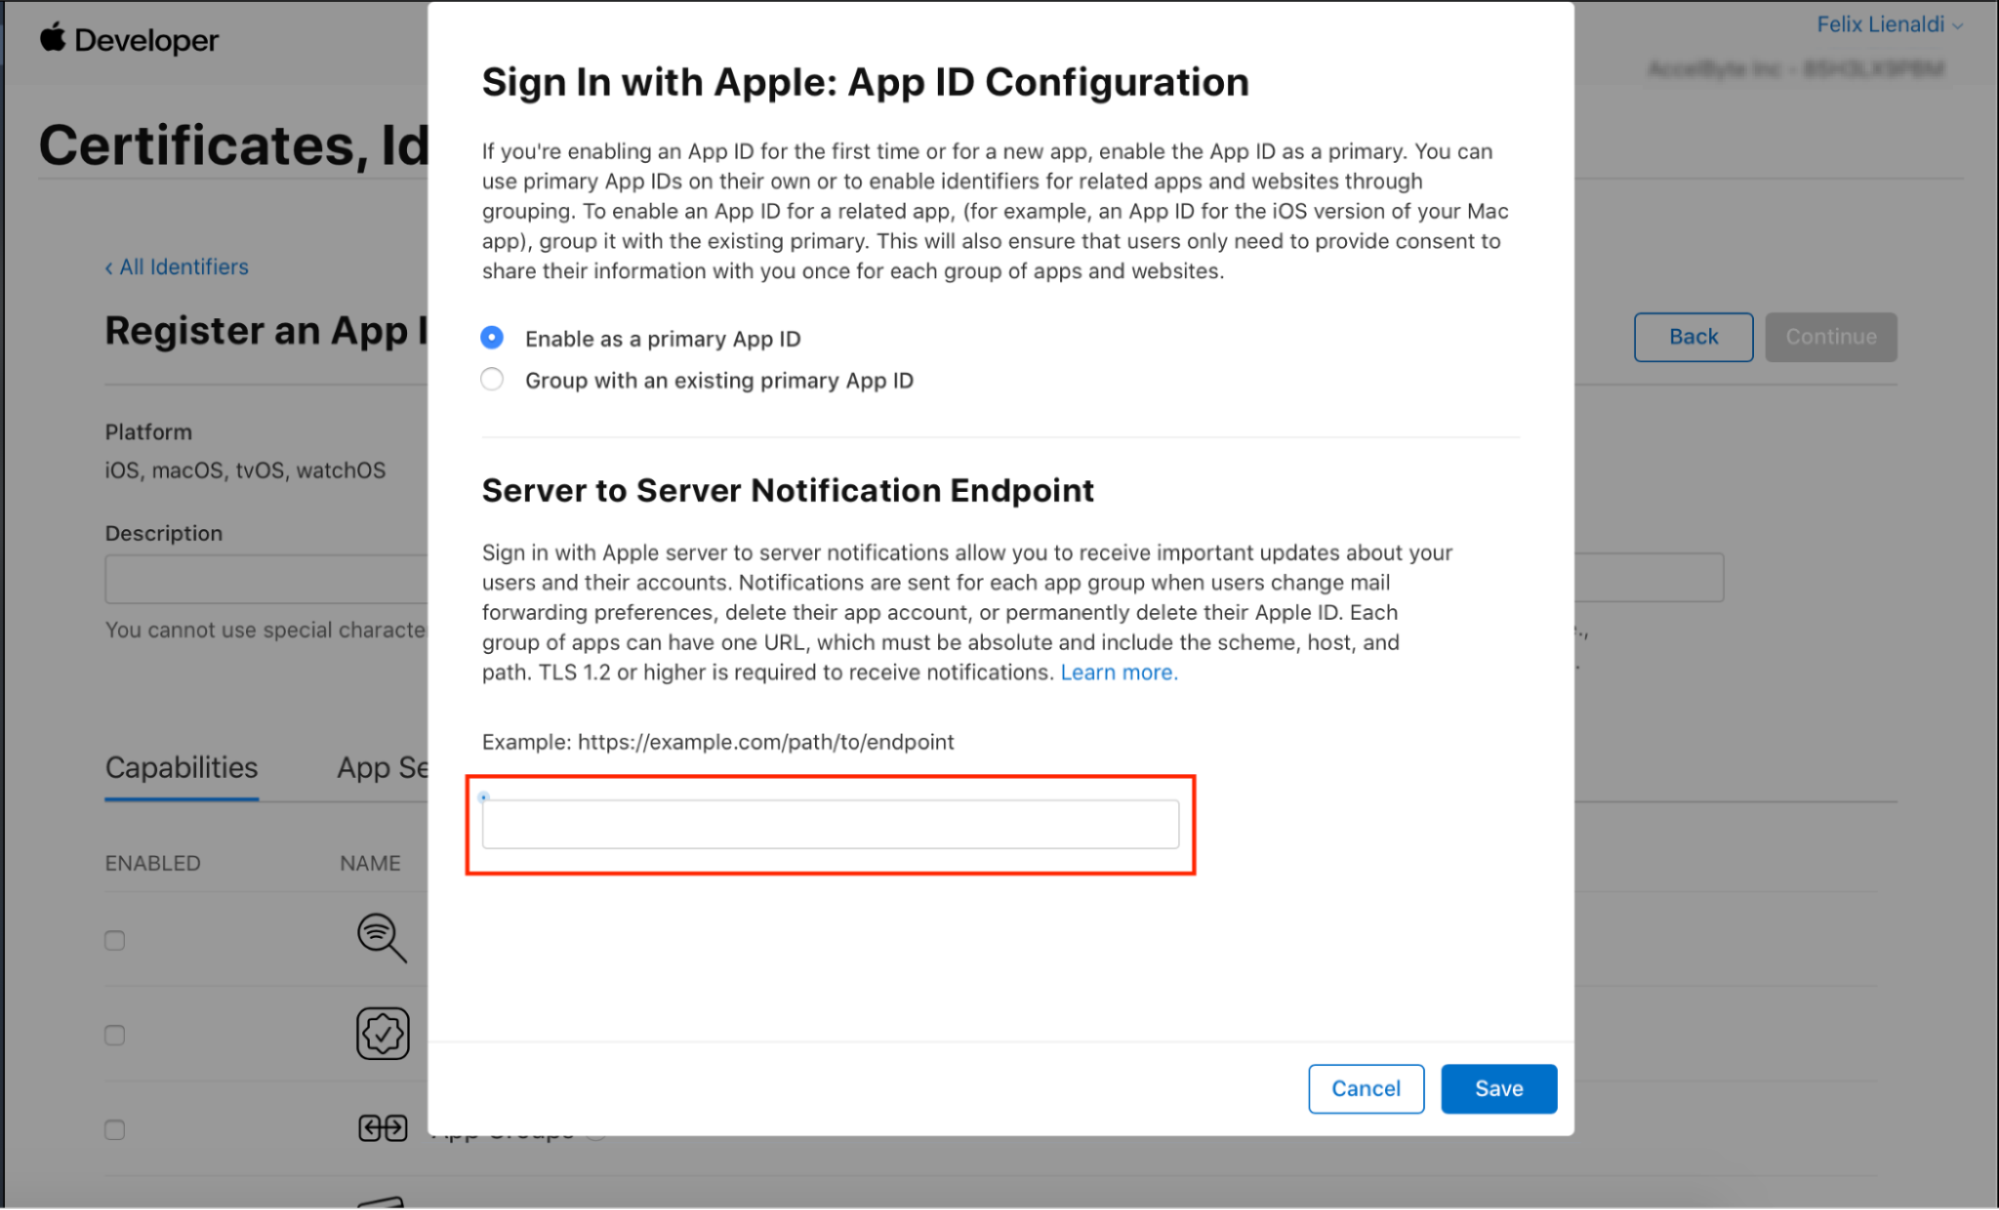
then click Save.
Click Continue.
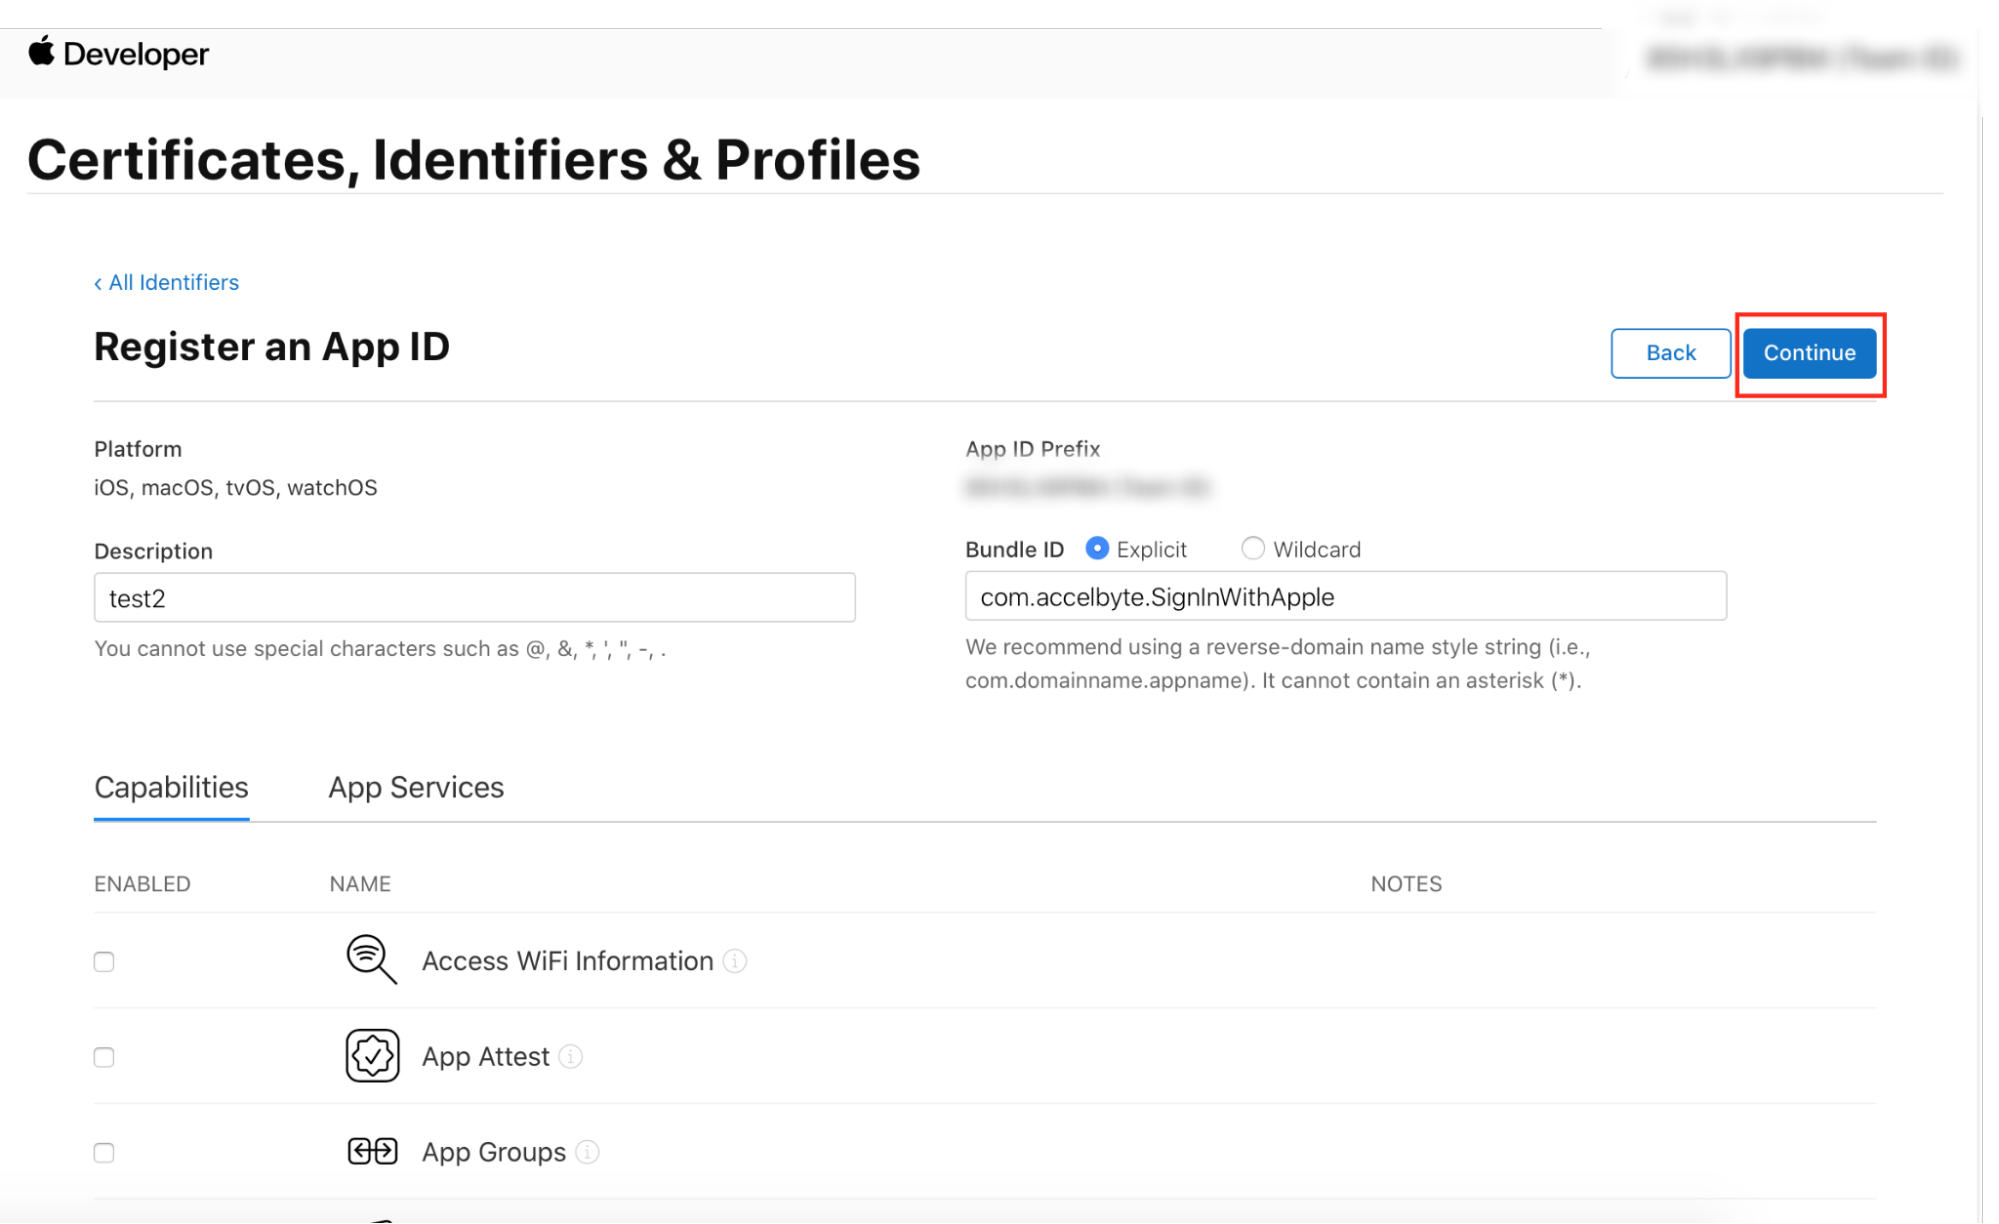
You will be redirected to the confirmation page. Make sure all the data you have entered is correct. Then, click Register to create the App ID.
Create a Keys ID
Follow the steps below to create a Keys ID:
On the Certificates, Identifiers & Profiles page, click the Keys menu and click the plus (+) button.
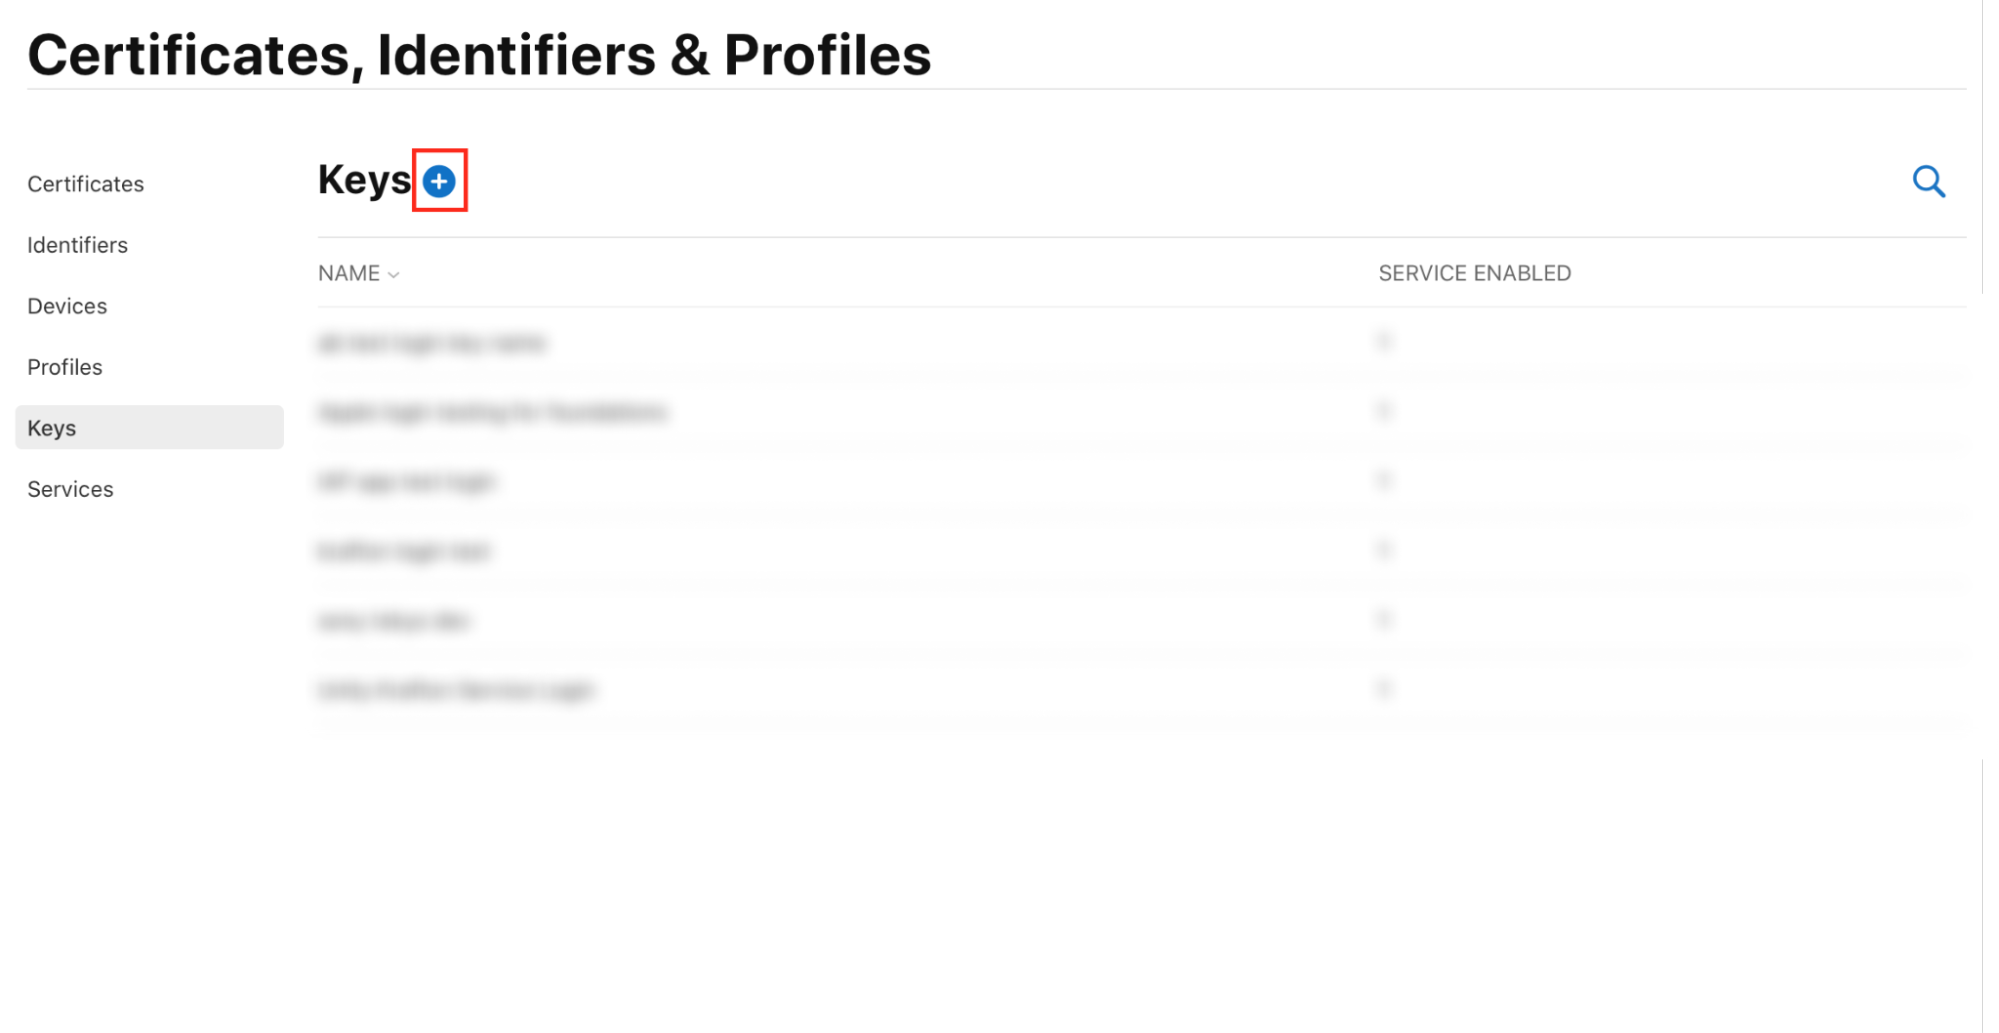
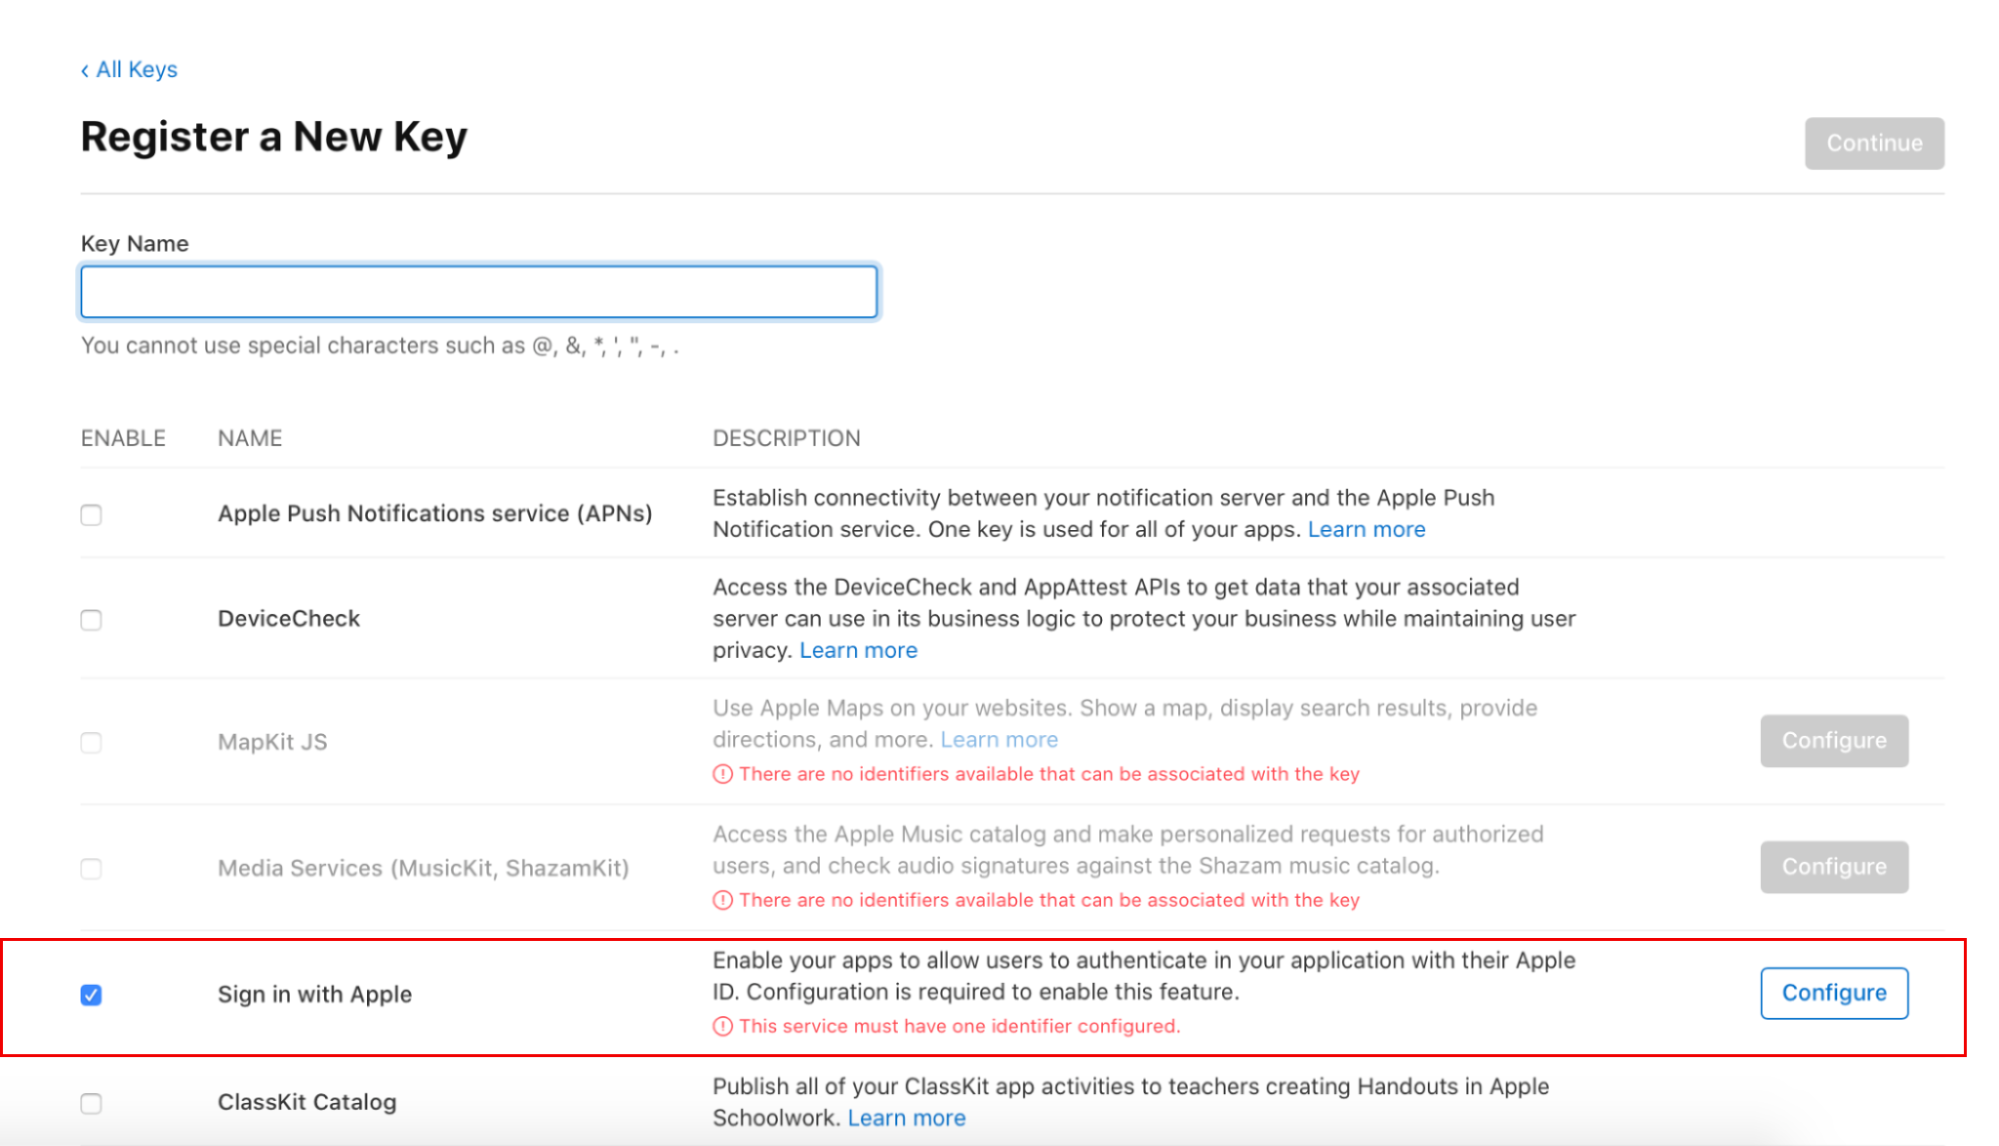
The Register a New Key page appears. Enter the Key name and enable Sign in with Apple, then press Configure.
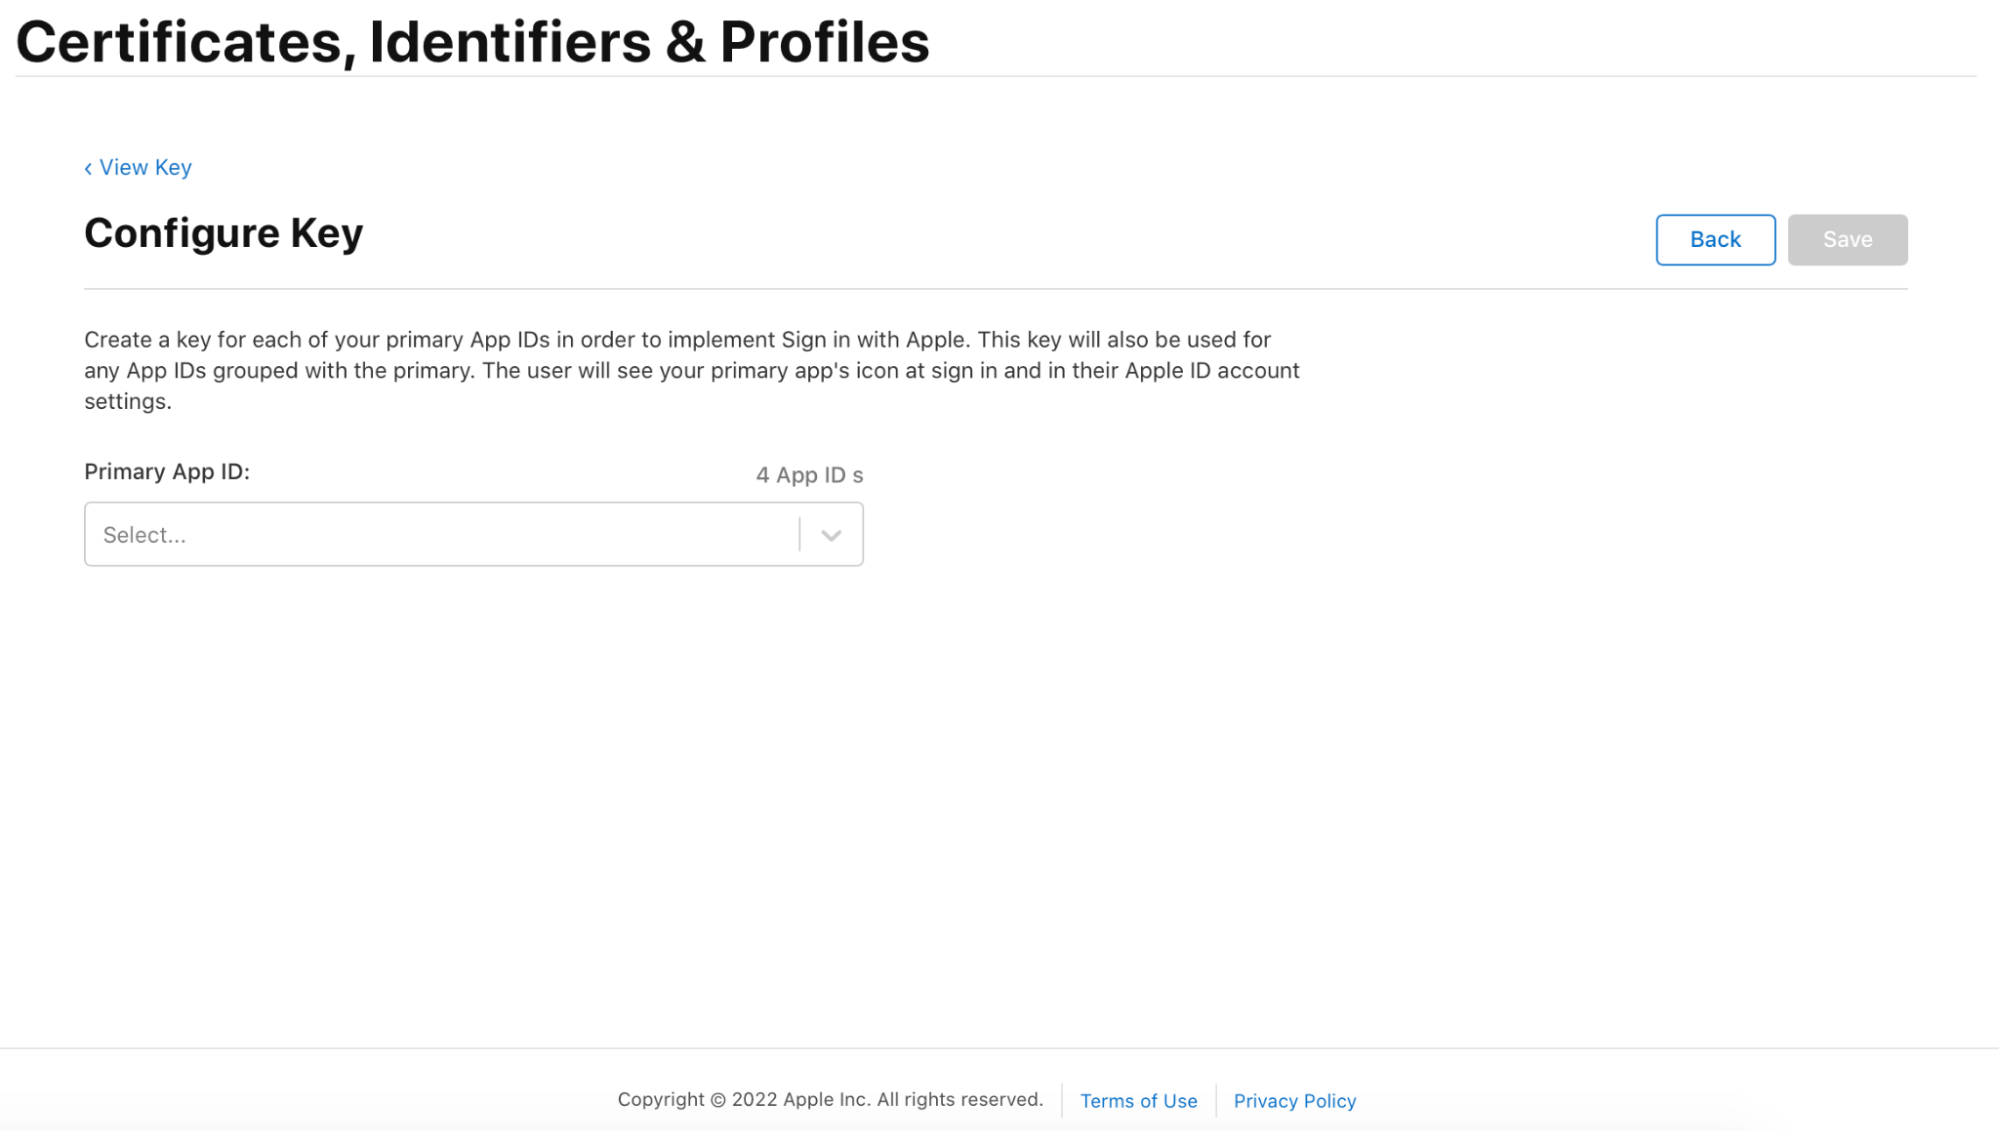
Choose your primary App ID. Use the App ID that you created earlier and click Save.
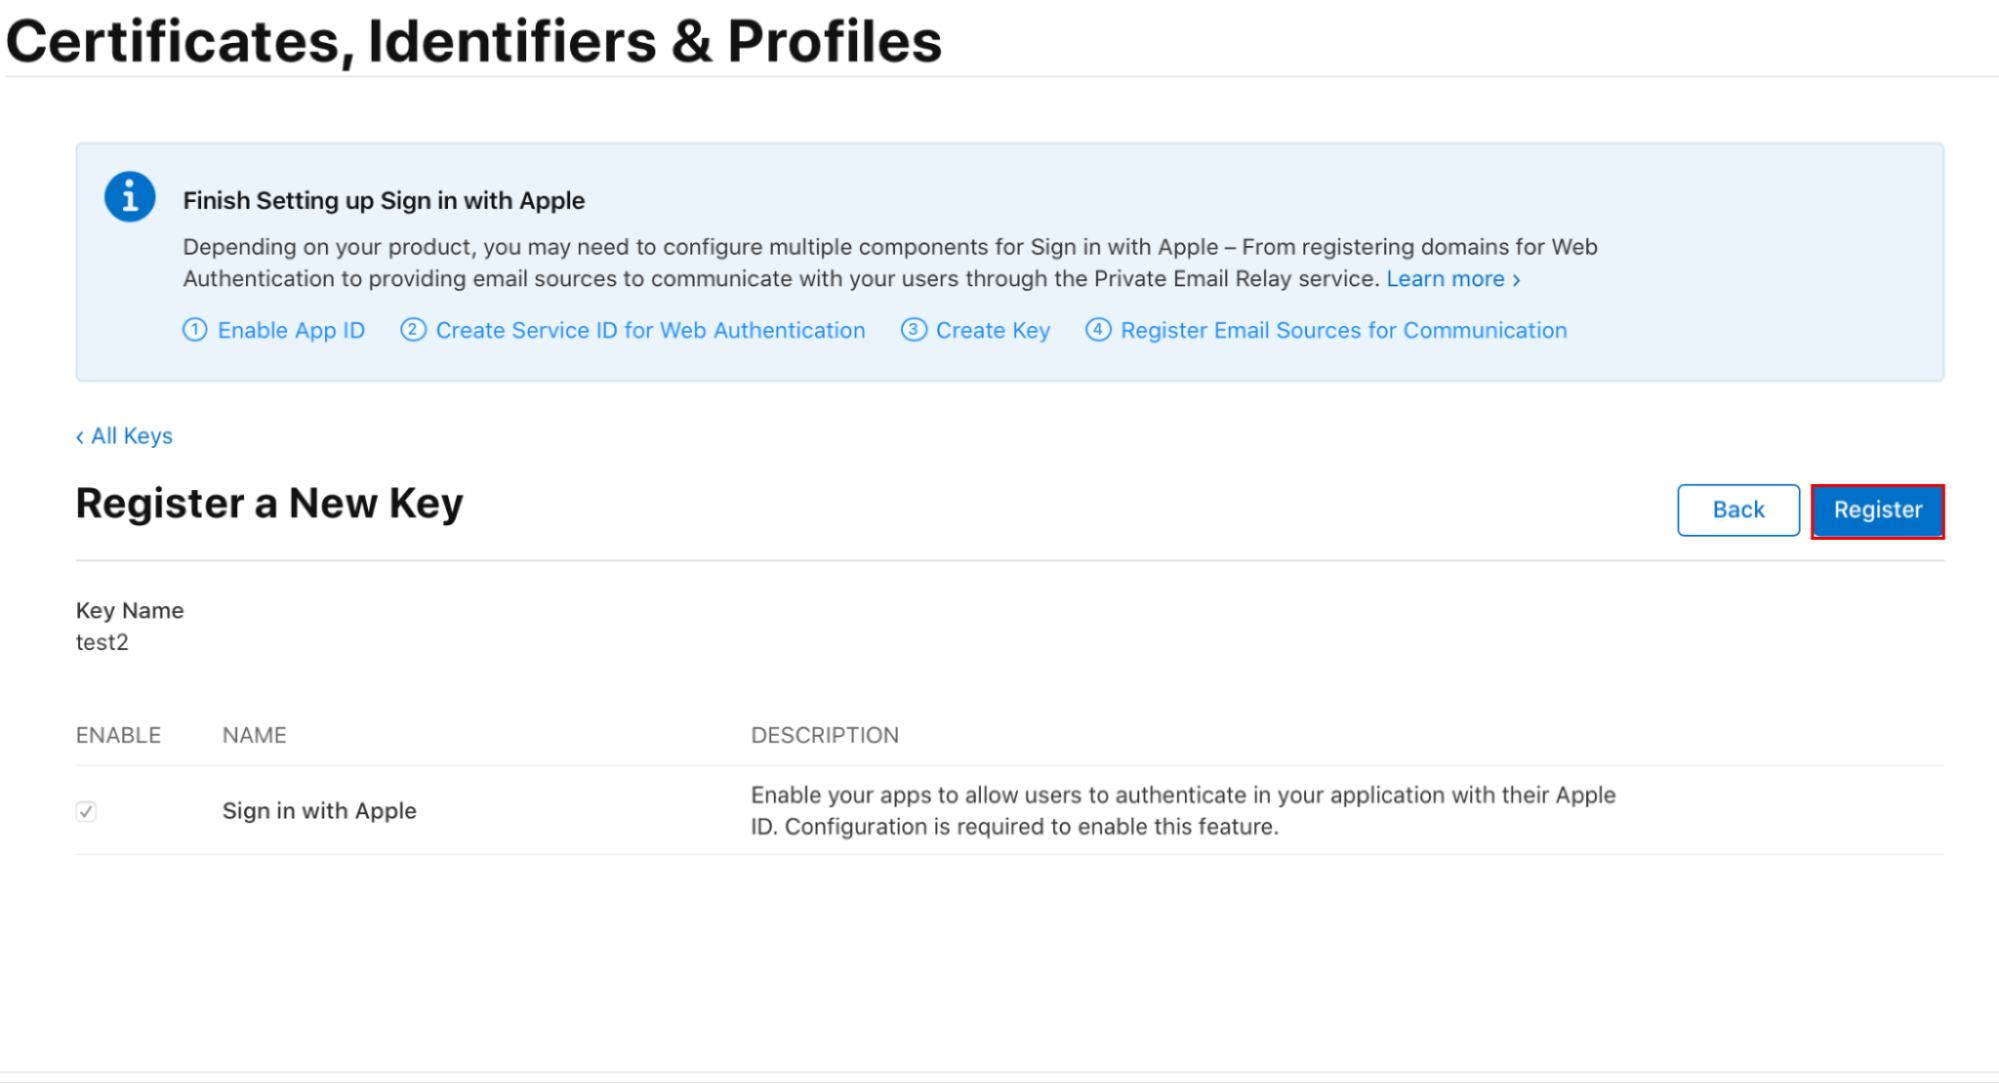
You will be redirected back to the previous page. Click Continue.
Click Register.
Make sure to save the Key ID as you will use it in the next section to create a client secret. Then, click Download to download the private key.
IMPORTANTOnce you have downloaded the private key, you cannot download it again. Make sure that you save it in a secure place.
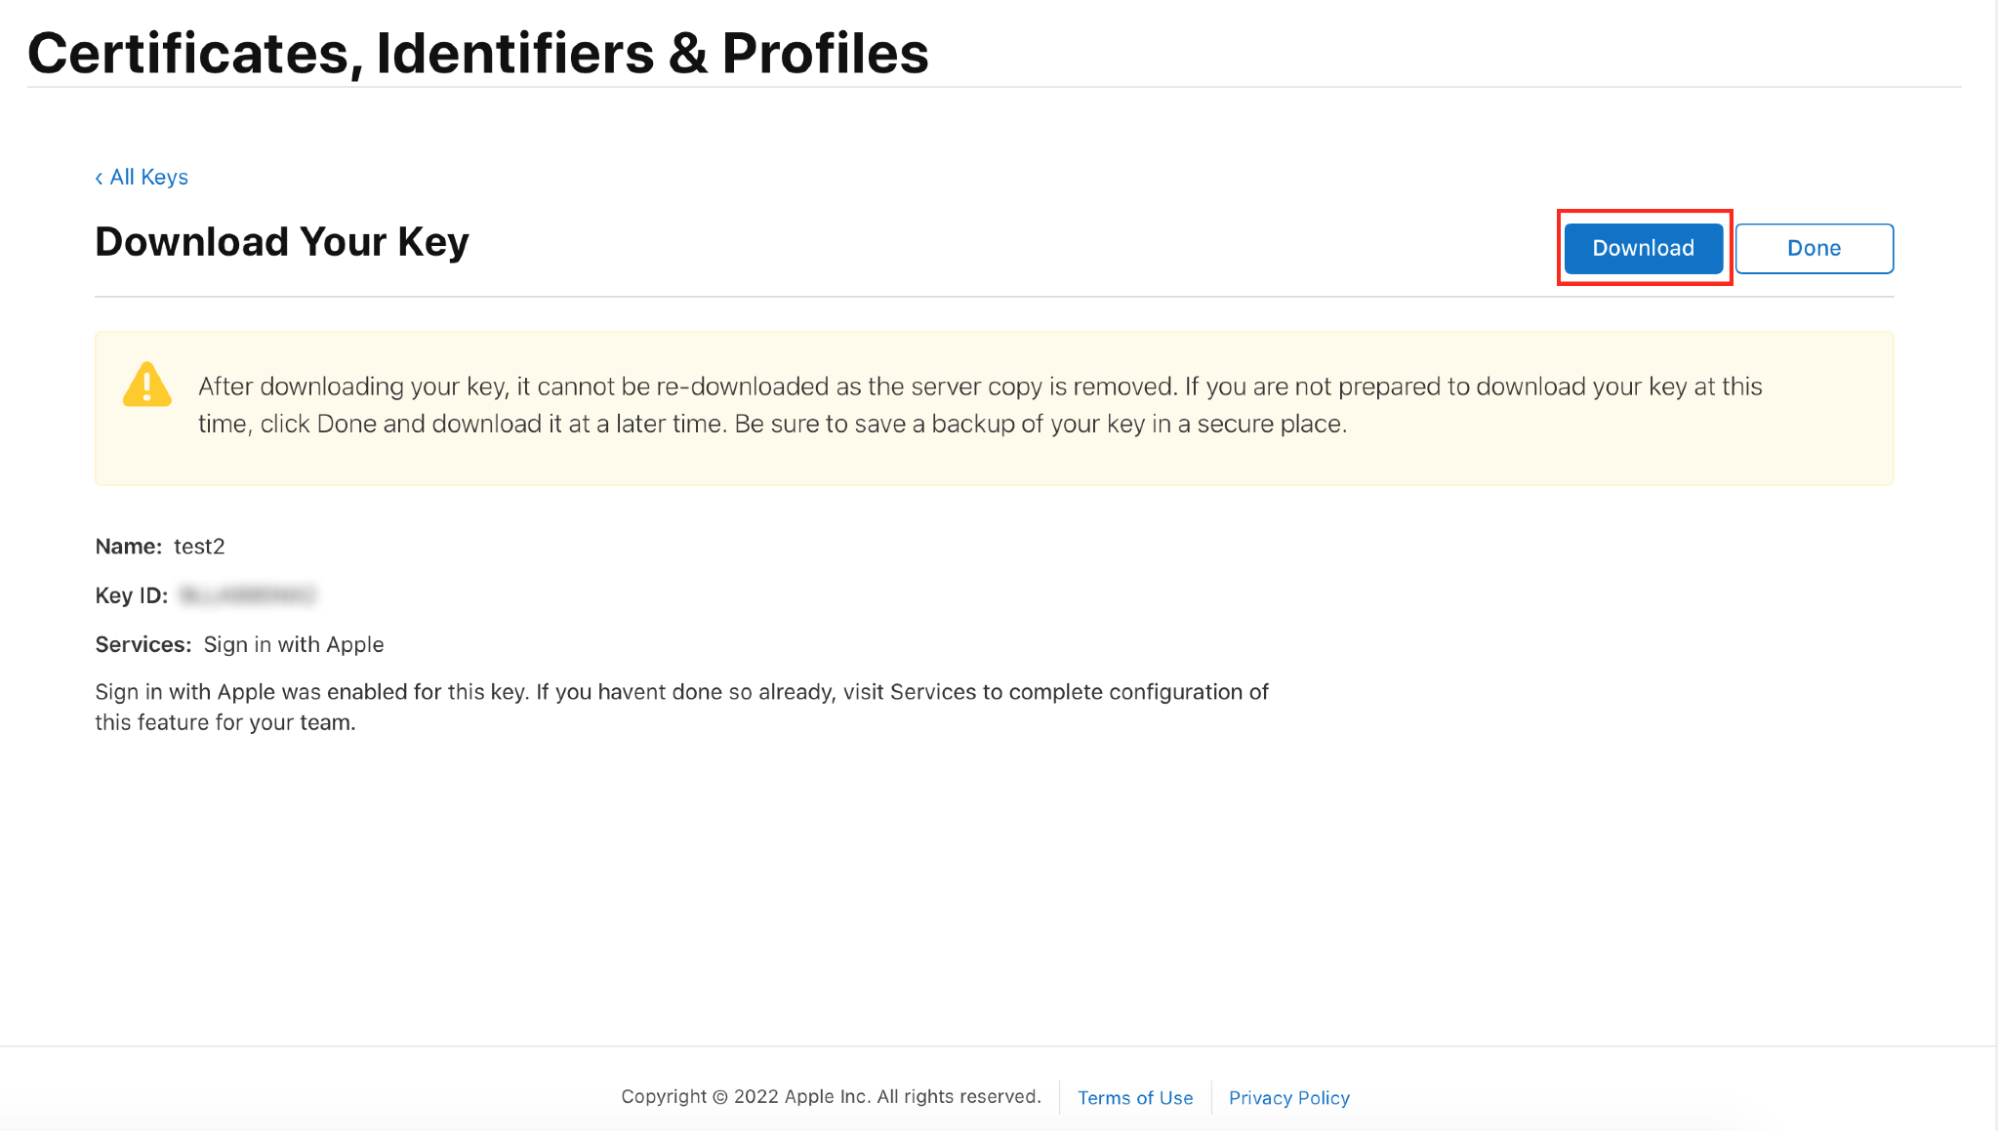
Click Done.
Create a Client Secret
Follow the steps below to create a Client Secret :
Open the private key you’ve downloaded in the previous step. It should be in .p8 format.
Convert it to a .pem file with OpenSSL. You can use the code given below to convert from .p8 to .pem format.
openssl pkcs8 -nocrypt -in AuthKey.p8 -out AuthKey.pemOpen the newly-converted .pem file.
Copy the entire private key, starting from BEGIN PRIVATE KEY until END PRIVATE KEY.
Go to Base64 Encoder and encode the private key you’ve copied from the .pem file.
Save the encoded private key.
Configure Apple Login in the Admin Portal
Follow the steps below to configure Apple login from the Admin Portal:
Open your game title in the Admin Portal. Expand the User Management menu, click Login Methods, and select Apple.
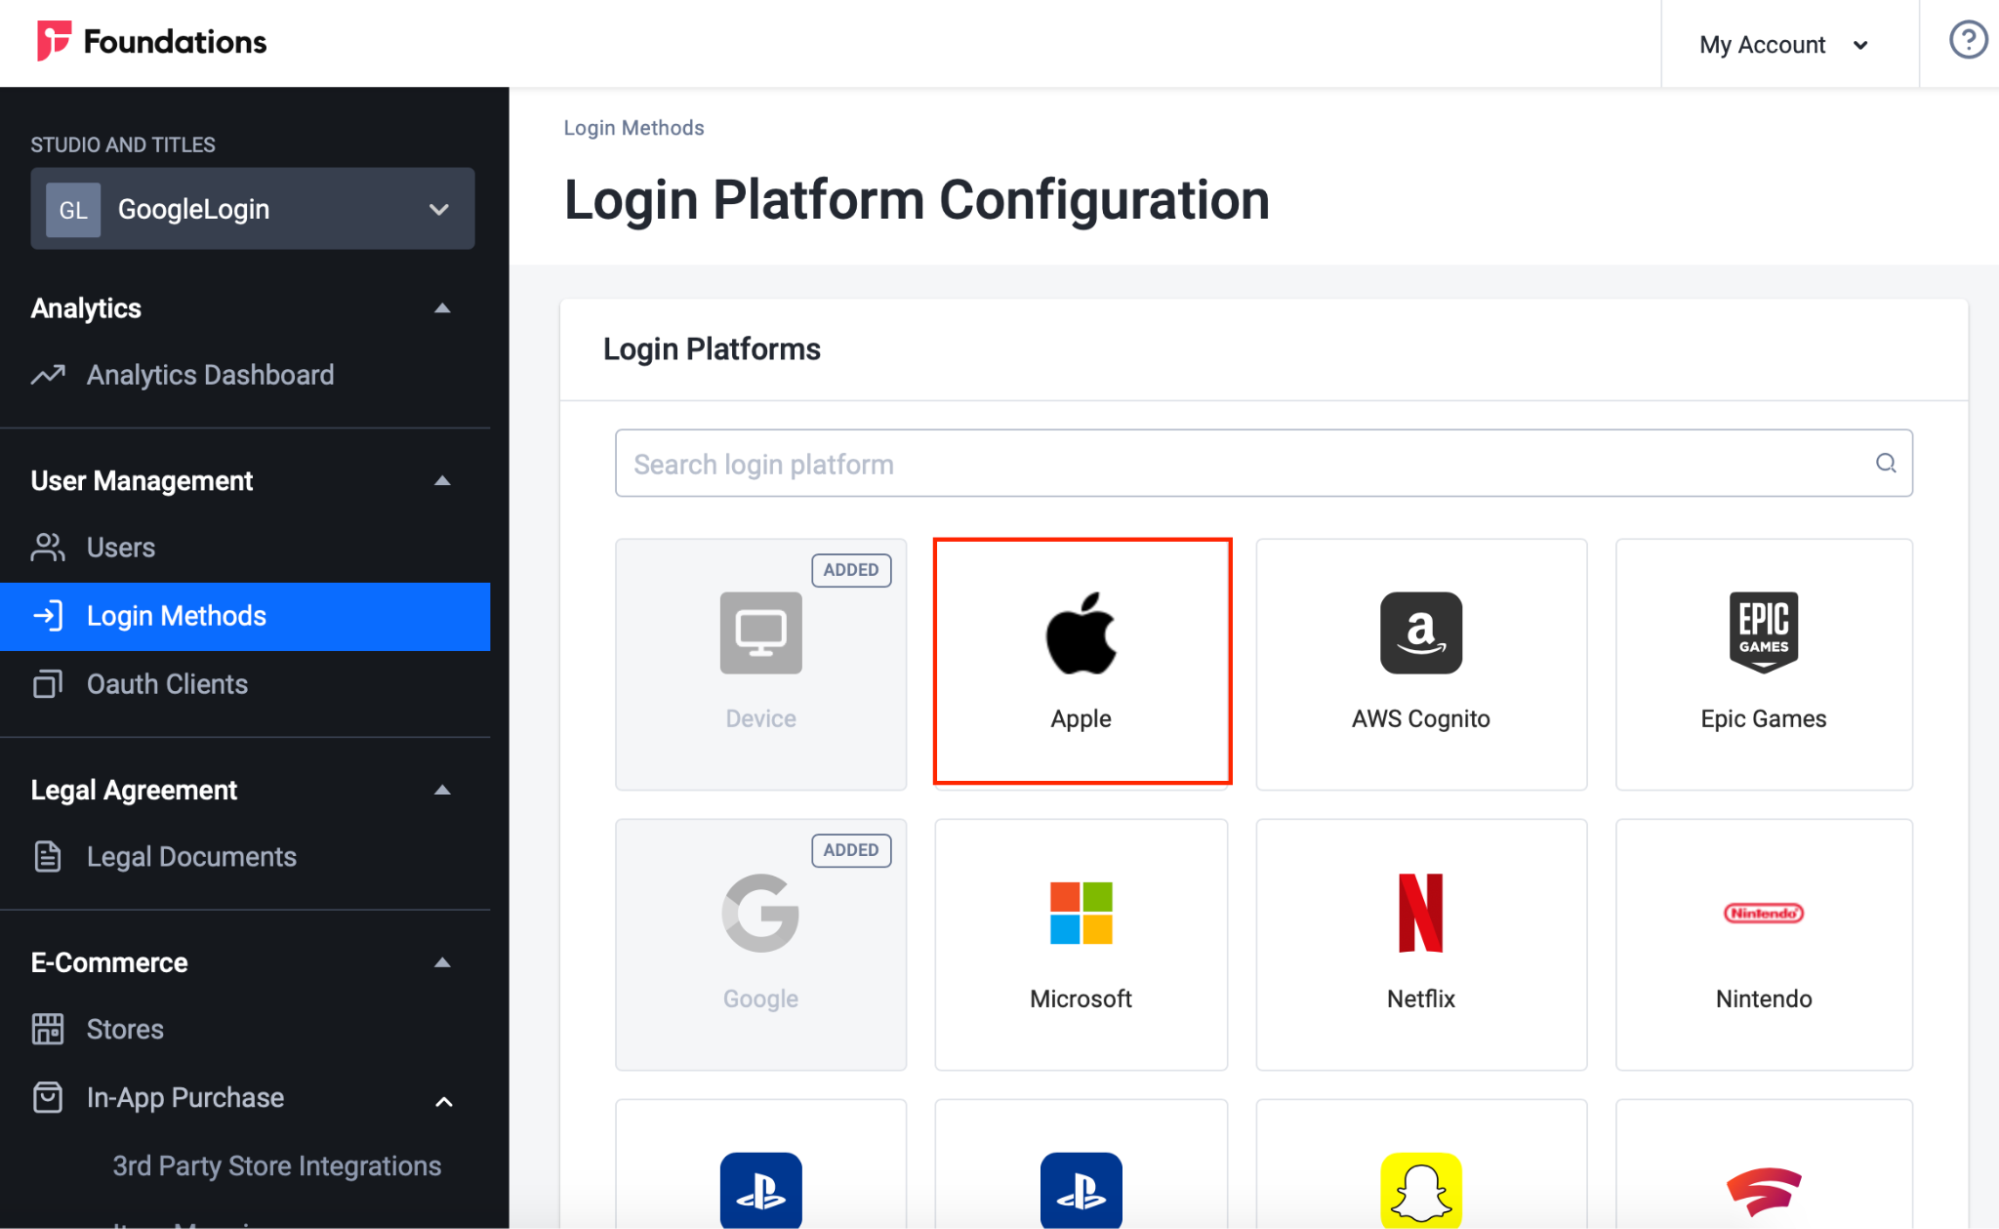
The Create Configuration form appears.
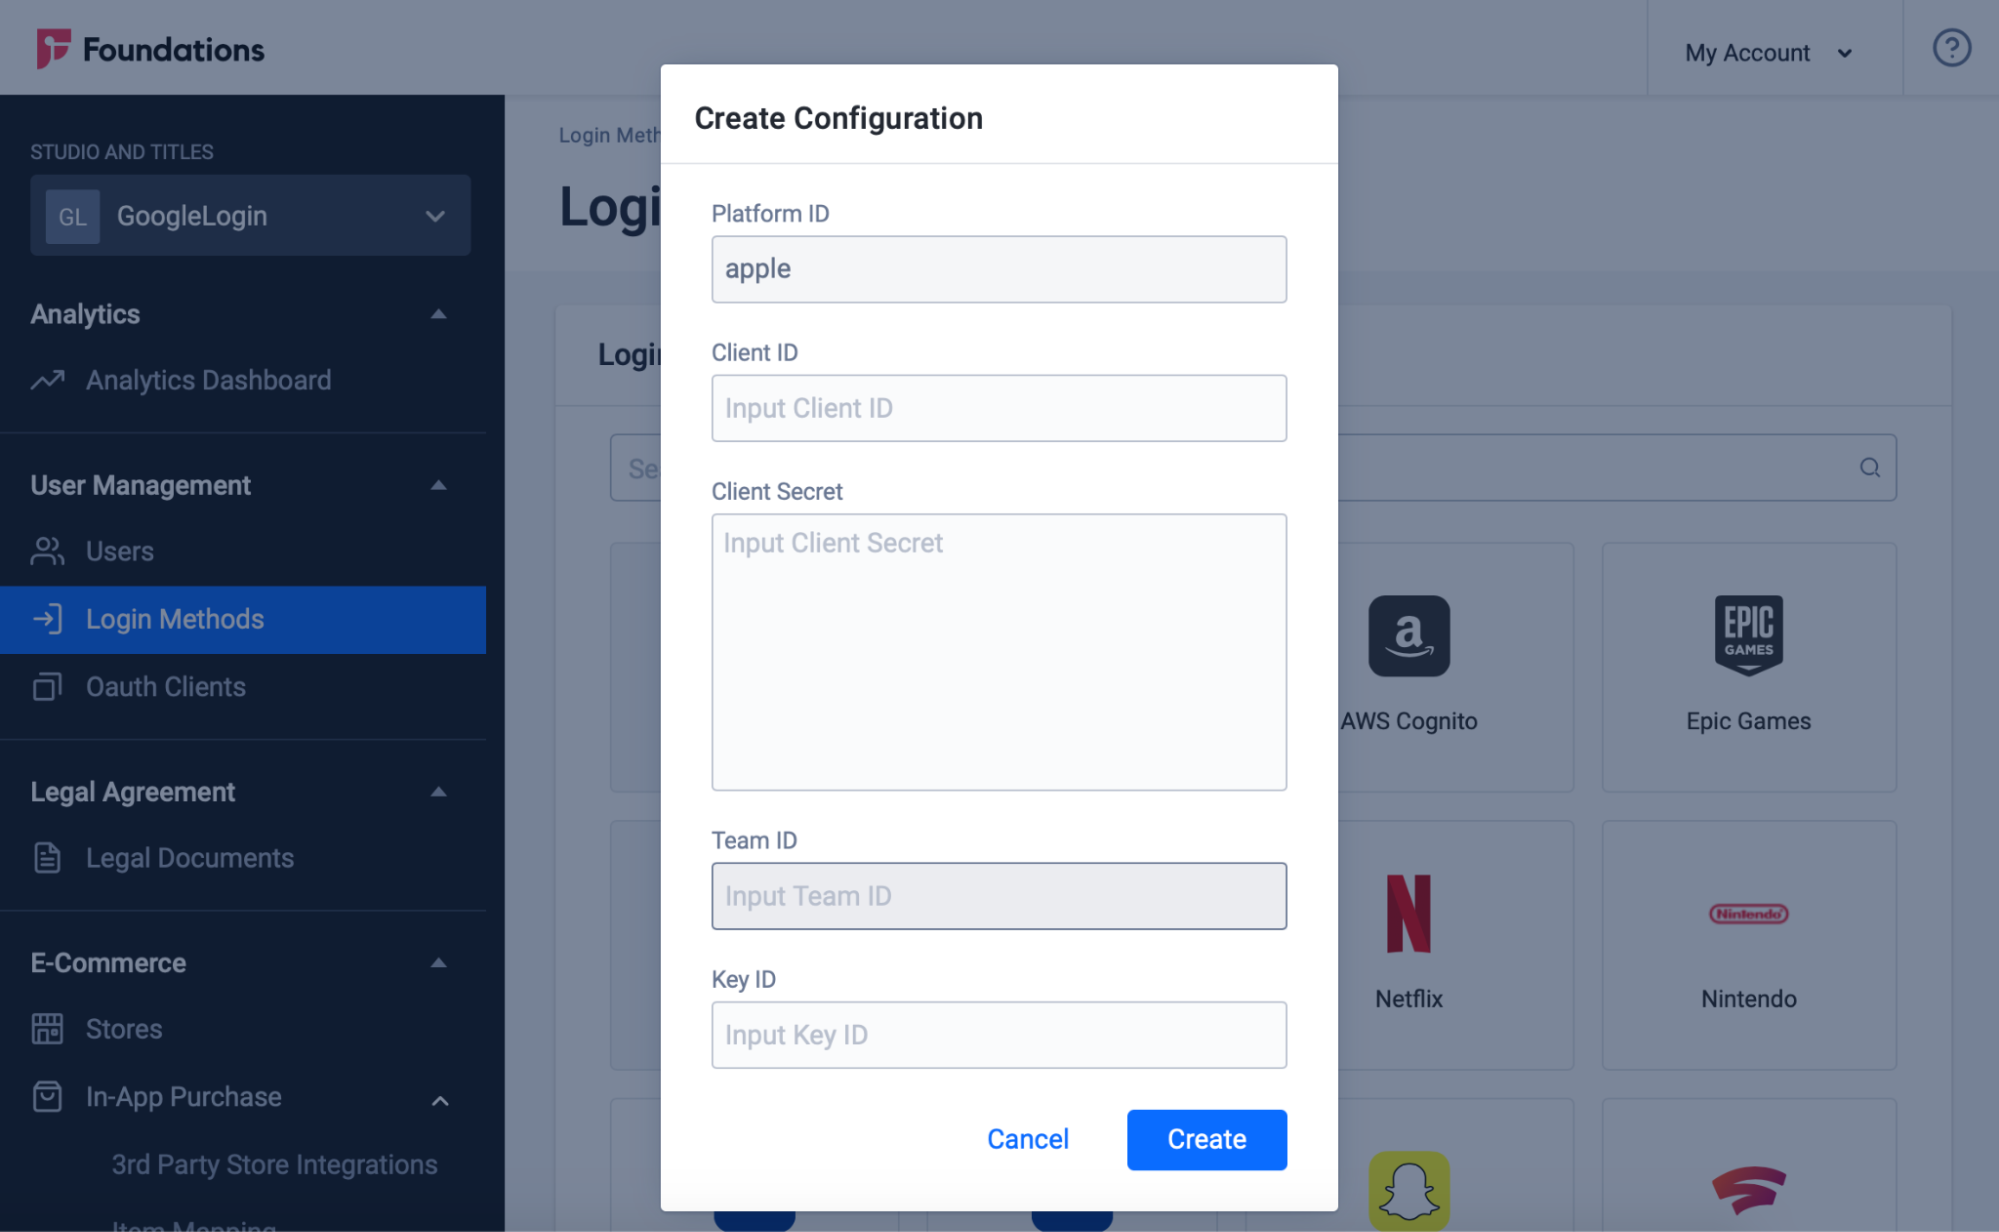
Fill in the fields as instructed:
- Client ID: input the Bundle ID.
- Client Secret: input the client secret that you created earlier.
- Team ID: input the team ID that is available in the top-right corner of the Apple developer page.
- Key ID: input the Key ID that you created earlier.
Click Create.
Set up Apple Login in the Unity Project
Follow the steps below to set up Apple login in your Unity project:
- Open Unity. The Accelbyte SDK and Apple Sign In For Unity SDK plugin must be imported before you proceed.
- Create a script for Apple sign-in.
- Copy the following code example:
private IAppleAuthManager appleAuthManager;
    public TextMeshProUGUI text;
    public StringBuilder builder =new StringBuilder();

    void Start()
    {

        // If the current platform is supported
        if (AppleAuthManager.IsCurrentPlatformSupported)
        {
            // Creates a default JSON deserializer, to transform JSON Native responses to C# instances
            var deserializer = new PayloadDeserializer();
            // Creates an Apple Authentication manager with the deserializer
            this.appleAuthManager = new AppleAuthManager(deserializer);
        }

    }

    void Update()
    {

        // Updates the AppleAuthManager instance to execute
        // pending callbacks inside Unity's execution loop
        if (this.appleAuthManager != null)
        {
            this.appleAuthManager.Update();
        }

    }

    public void SignIn()
    {
        var loginArgs = new AppleAuthLoginArgs(LoginOptions.IncludeEmail | LoginOptions.IncludeFullName);

        this.appleAuthManager.LoginWithAppleId(
            loginArgs,
            credential =>
            {
        // Obtained credential, cast it to IAppleIDCredential
        var appleIdCredential = credential as IAppleIDCredential;
                if (appleIdCredential != null)
                {
            // Apple User ID
            // You should save the user ID somewhere in the device
            var userId = appleIdCredential.User;
            //PlayerPrefs.SetString(AppleUserIdKey, userId);

            // Email (Received ONLY in the first login)
            var email = appleIdCredential.Email;

            // Full name (Received ONLY in the first login)
            var fullName = appleIdCredential.FullName;

            // Identity token
            var identityToken = Encoding.UTF8.GetString(
                        appleIdCredential.IdentityToken,
                        0,
                        appleIdCredential.IdentityToken.Length);

            // Authorization code
            var authorizationCode = Encoding.UTF8.GetString(
                        appleIdCredential.AuthorizationCode,
                        0,
                        appleIdCredential.AuthorizationCode.Length);

                    // And now you have all the information to create/login a user in your system
                    ConnectToAccelbyte(authorizationCode.ToString());
        }
            },
            error =>
            {
                        // Something went wrong
        var authorizationErrorCode = error.GetAuthorizationErrorCode();
            });
    }

    public void ConnectToAccelbyte(string Token)
    {
        User user = AccelBytePlugin.GetUser();

        user.LoginWithOtherPlatform(PlatformType.Apple, Token, (Result<TokenData, OAuthError> result) =>
        {
            //result.value will bring access token and user information
            Debug.Log(result.ToJsonString());
            Debug.Log(result.Value.ToJsonString());
        });
    }
Build Unity Project into iOS and open the build with XCode.
- With Apple devices: If you want to test it with your apple devices, you must first set up and register the devices in the apple developer page before testing the build.
- Without Apple devices: You can test this by running an apple device simulator inside XCode.
You can find more information about testing in XCode here.
If everything goes correctly, it should go like this.